Internal renovation of basements with flexible waterproofing mortars
Due to the growing interest in the preservation of valuable building substance, the importance of renovation of basement rooms is constantly growing. A prior inventory and an analysis of the damages are prerequisites for a successful renovation. Investigations of the moisture and salt content on internal and external walls provide important findings on the causes of the damage. Based on these data, the renovation concept is drawn up.
Simple & safe to the goal
-
3. Remove the old render at least 80 cm above the damaged area. Scrape out the brittle joint mortar network at a depth of 2 cm and level with the watertight mortar weber.tec 933.
-
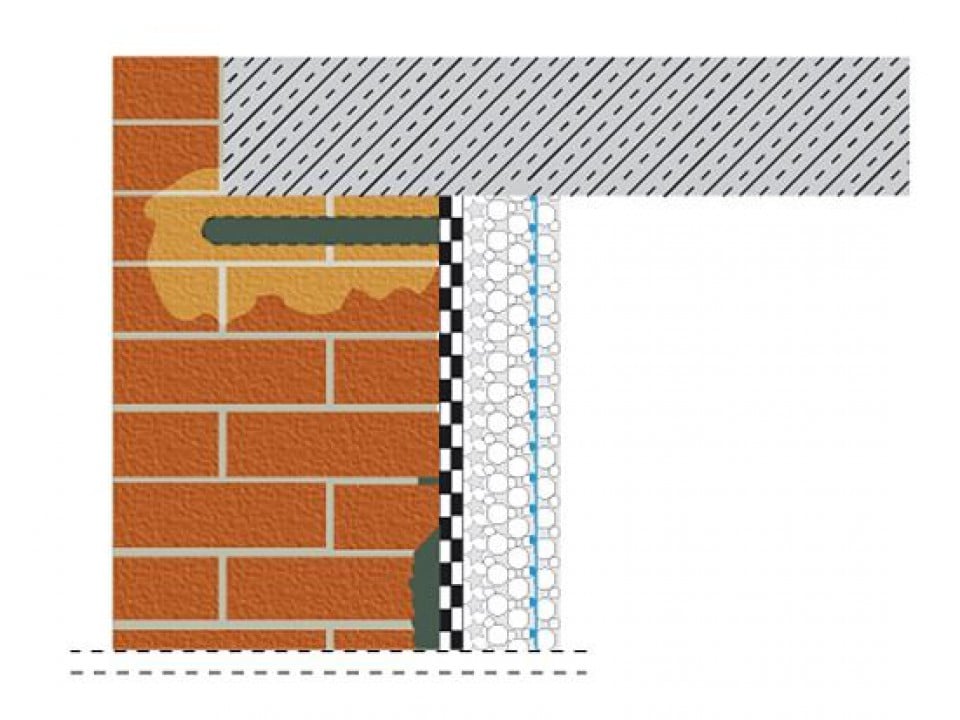
4. Chisel a recess of 4 x 4 cm in the internal angle (concrete slab/basement wall) to obtain a good key for weber.tec 933 as post-applied groove mortar with the substrate. If a horizontal damp-proof barrier is existing, chisel a recess of 2 x 2 cm in this specific area.
-
6. Apply weber.tec 933 mixed in brush consistency as a bonding layer on the dull-moist substrate.
-
7. Apply weber.tec 933 (trowel consistency) as patching mortar on the fresh bondcoat into the recess along the internal angle (concrete slab/basement wall) and upwards up to the masonry row with the horizontal bitumen sheet (if any). Afterwards, apply the mortar as groove mortar in a radius of 4 - 6 cm along the angle.
-
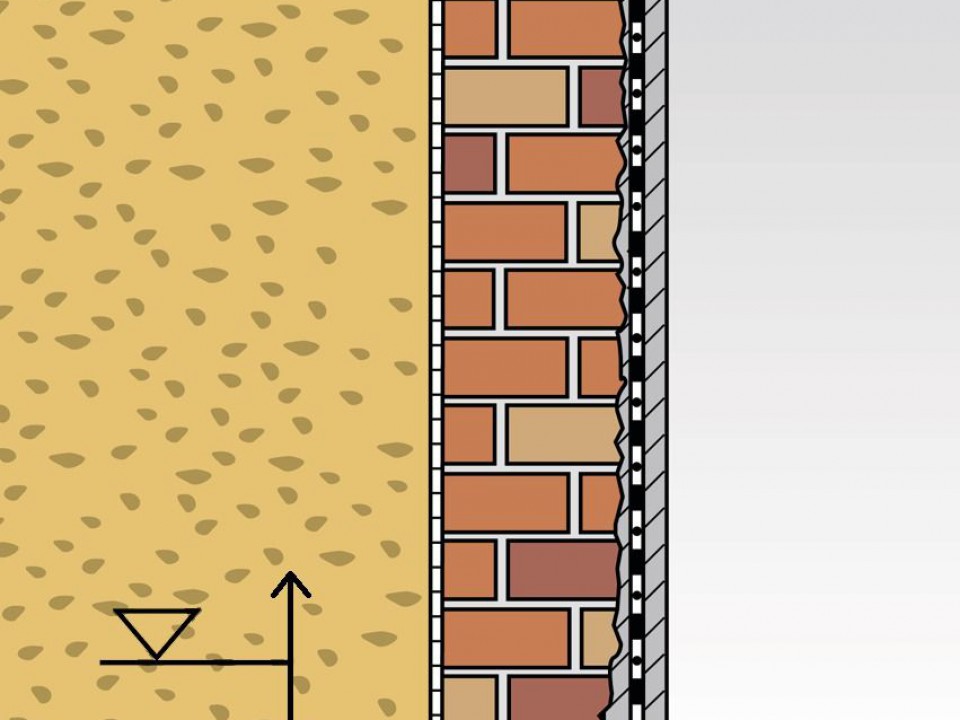
8. The position of the damp-proof barrier depends on the maximal height of the water level and the existence of exterior waterproofing. In case of non-existing waterproofing and changing water levels, the damp-proof barrier must be installed under the basement ceiling and the internal waterproofing must be installed above the damp-proof barrier.
-
9. Binding cross walls must be integrated in the internal waterproofing. For this purpose, a vertical damp-proof barrier with the liquid injection resin weber.tec 940 E or the injection cream weber.tec 946 is installed. Furthermore, the internal waterproofing with the 2-comp. reactive waterproofing slurry weber.tec Superflex D 2 is carried out above the damp-proof barrier.
-
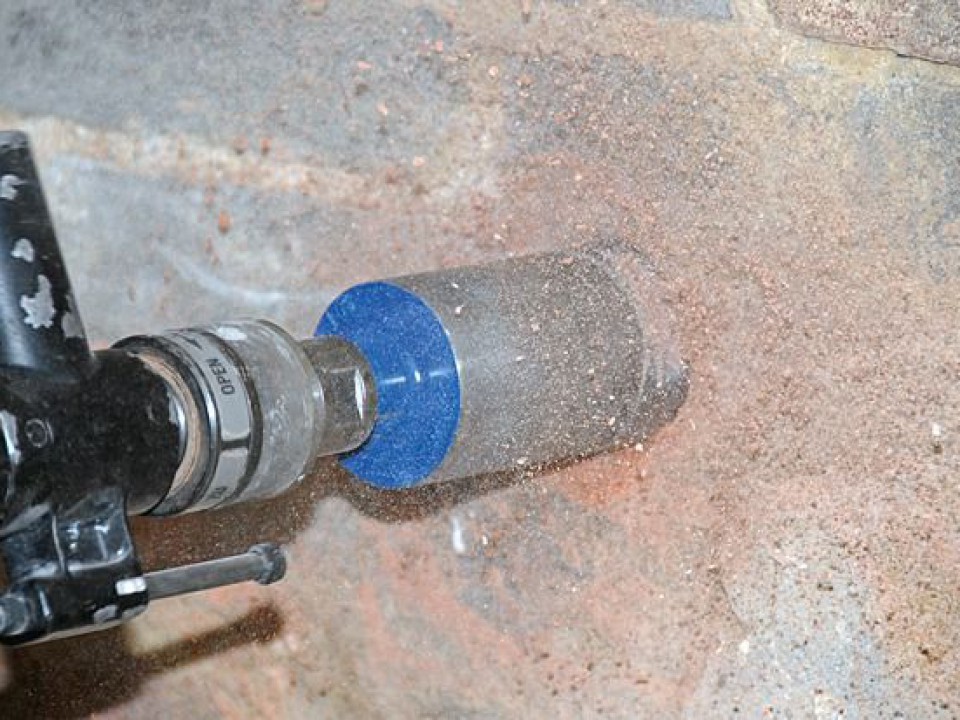
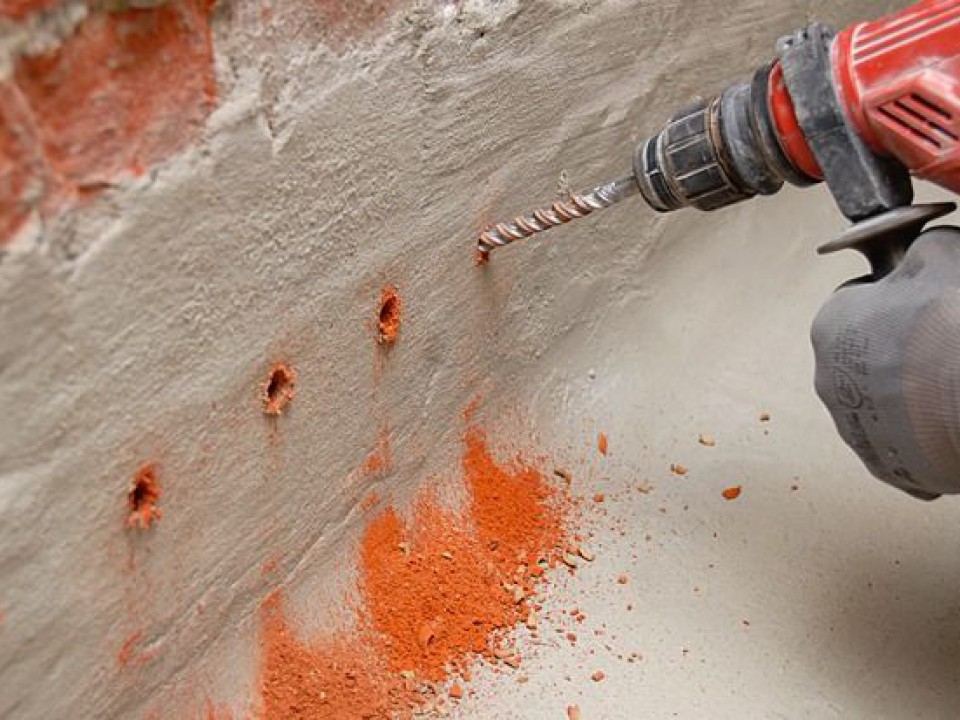
10. Drill boreholes in the damp masonry in a diameter of approx. 12 mm, at intervals of approx. 10 - 12 cm and at an angle of approx. 35°-45° for the application of the low-pressure horizontal damp-proof barrier. The preliminary use of the mortar weber.tec 933 as "blocking mortar" prevents pressure loss.
-
11. Blow the dust out of the drilled holes with air. Afterwards, place the injection packers into the holes and press the injection resin weber.tec 940 E in the low-pressure method through the packers. In the case of masonries with hollow space, fill the cavities with weber.tec 942 (low shrinkage cement-based borehole suspension) through special packers prior to injection works.
-
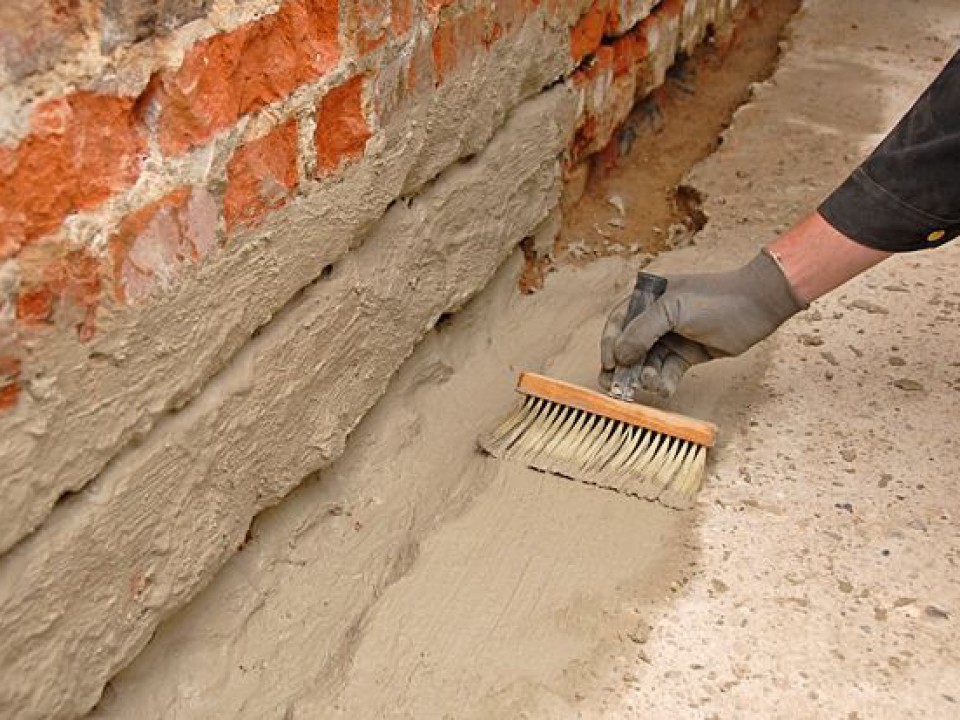
13. The internal waterproofing with the 2-comp. reactive waterproofing slurry weber.tec Superflex D 2 is done in at least 2 layers, using a block brush.
-
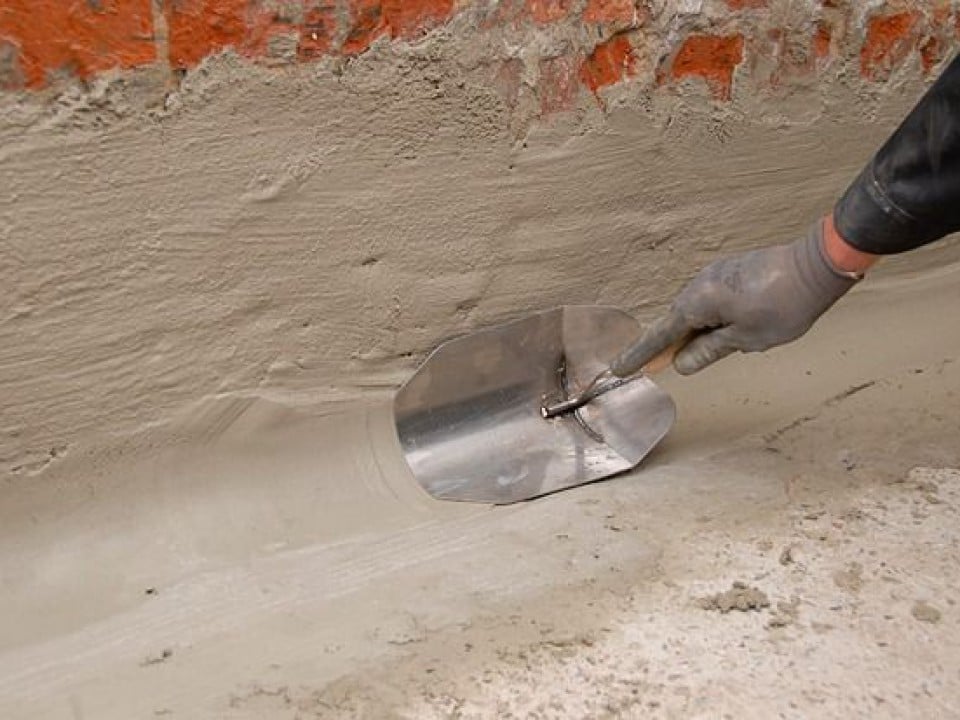
14. After thorough drying of weber.tec Superflex D 2 apply the quick-setting stipple coat weber.san 951 S with full coverage. This bondcoat provides the bonding with the following damp-proof render/plaster.
-
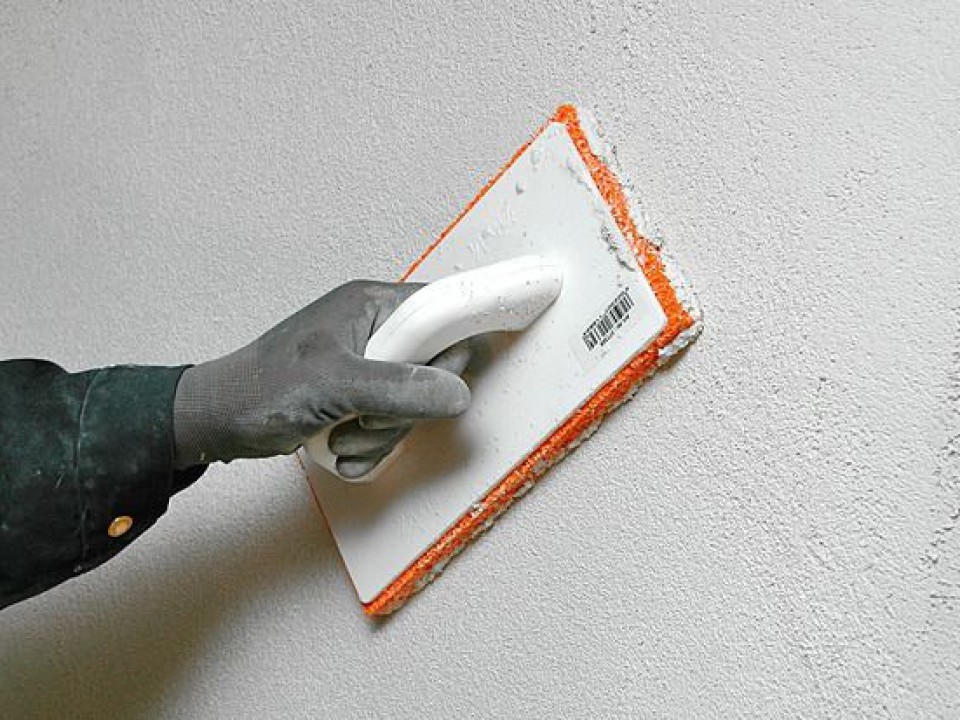
15. After drying of the bondcoat apply the damp-proof render/plaster weber.san 954 full-surface in a thickness of 10 - 15 cm and lay the reinforcement woven mesh for damp-proof renders weber.sys 987.


Find all our products near you in more than 2000 outlets