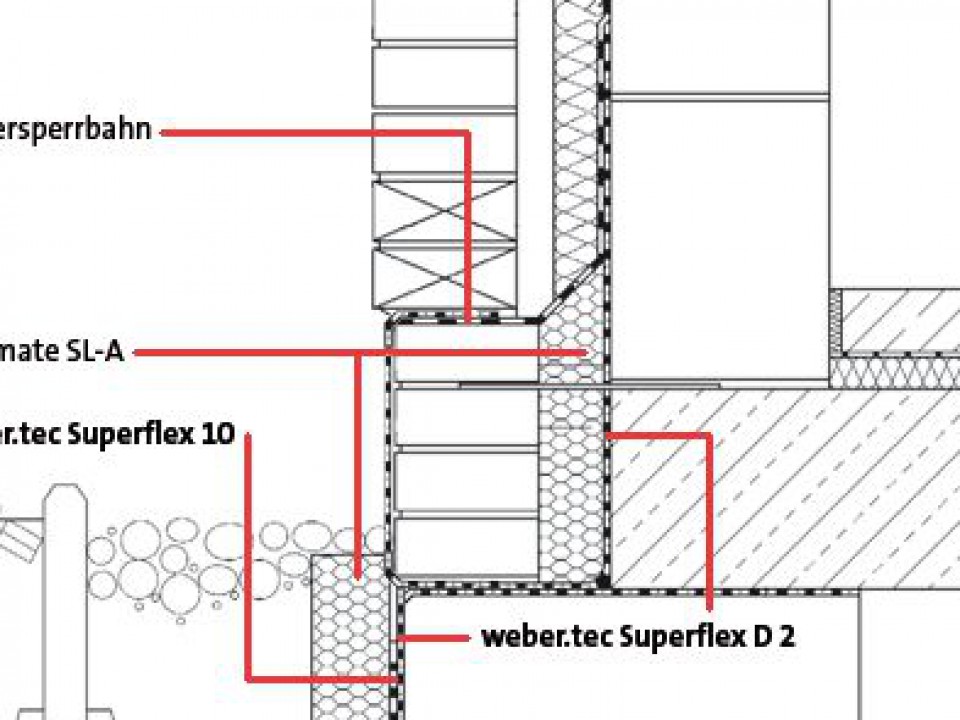
Waterproofing of the facade socket part depending on the construction set-up
Basically, a durably dry building structure also includes a long-term waterproofed facade socket part. The specific socket board is highly stressed by temperature fluctuations, splash water, salts and freeze/thaw cycles. Furthermore, a gapless transition from the perimeter insulation to the thermally insulated facade must be created here. In order to create a homogeneous waterproofing and prevent late damage, it is therefore crucial how the facade is executed: exposed masonry, rendered facade or ETICS.
Furthermore, it is necessary to determine the height of the upper ground level in order to define the limits of the waterproofing coatings. Depending on the type of facade, waterproofing of the socket area can be carried out by using reactive waterproofing coatings, flexible cement-based waterproofing coatings or bitumen thick-layer coatings.
Simple & safe to the goal
-
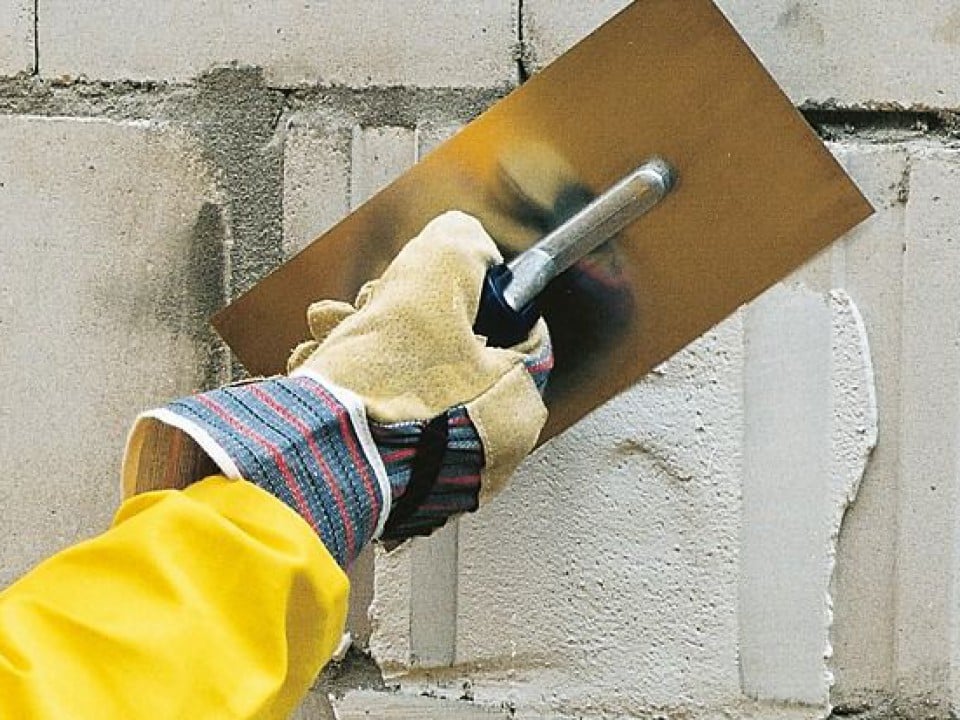
4. In case of multi-shell wall constructions, first a mineral mortar groove with the watertight mortar weber.tec 933 is installed at the bottom of the back-up masonry. Apply the mortar as bonding layer (brush consistency) on the dull-moist substrate. Then apply the mortar as groove mortar (trowel consistency) "wet-in-wet" with the preformed rounded trowel weber.sys Hohlkehlenschlitten.
-
5. When connecting the socket part to an ETICS facade, the waterproofing is carried out up to the top edge of the socket part. For this purpose, fill broken out areas and defects with a width and depth ˃ 5 mm with e.g. weber.tec 933. Then apply the primer for absorbent substrates weber.prim 801, diluted with water in a ratio of 1 : 1 part by volume.
-
6. Substrates with textured pattern or with porous aggregate particles must be levelled with a scratch layer of the 2-comp. reactive and quick-setting waterproofing coating weber.tec Superflex D 24 (2-comp. reactive and quick-setting waterproofing coating) mixed with quartz sand (grain size 0.1 - 0.5 mm) in a ratio of 3 : 1 parts by volume.
-
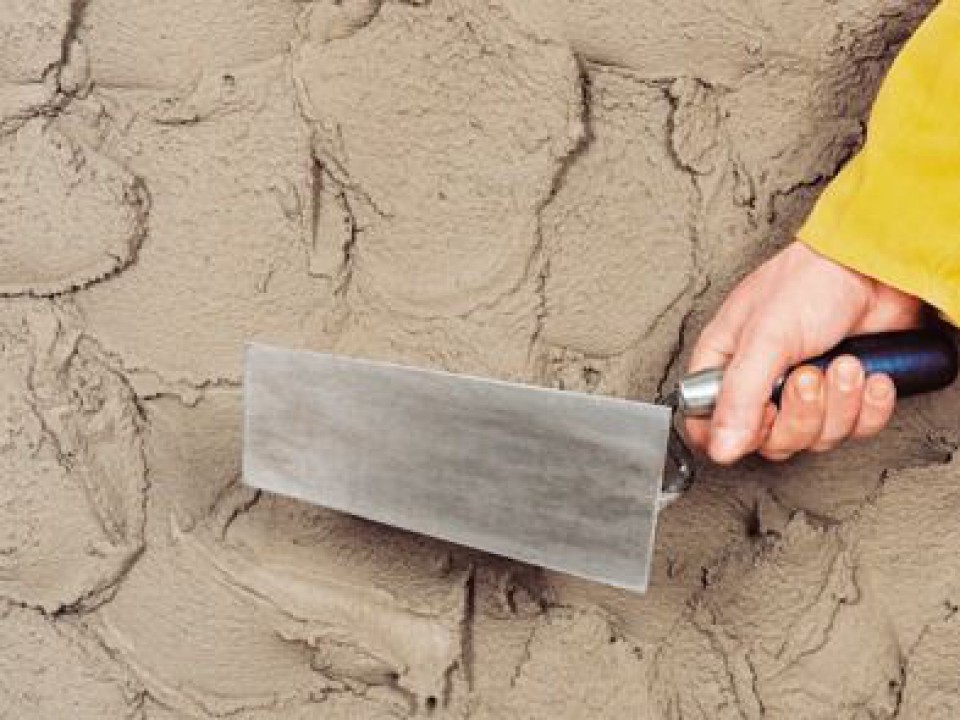
7. Apply weber.tec Superflex D 24 with the flat trowel weber.sys Aufstreichkelle + triangular notched blade Zahnleiste no. 2 (notch size 5 mm) and smooth the surface with a flat trowel.
-
8. Waterproofing of facade socket part with weber.tec Superflex D 24 in case of double-shell construction. The upper part of this waterproofing is connected to the pre-said membrane. The exterior basement wall waterproofing is overlapping over the thoroughly dried waterproofing of the socket part.
-
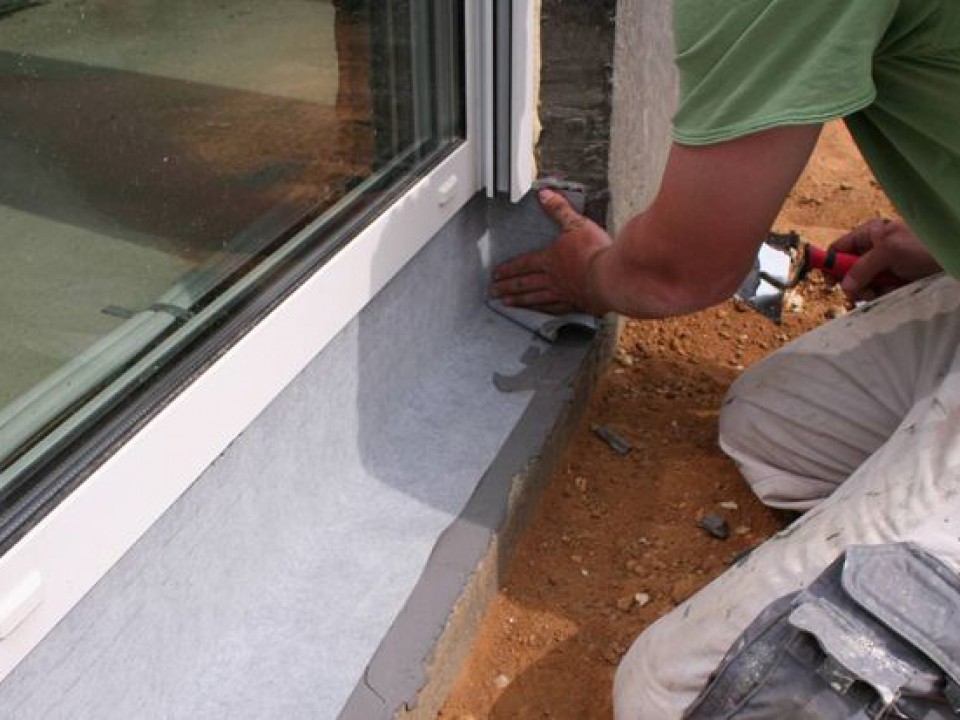
10. Waterproofing of the flush-to-floor window connection with weber.tec Superflex D 24 at the transition area with the back-up masonry. A fabric insert like weber.sys 981 is used at the transition areas.
-
11. Waterproof the door connection with weber.tec Superflex D 24. The waterproofing is applied overlapping to the lower door beam and to the wall reveals. The first layer is reinforced full-surface with the watertight foil weber.sys 982.
-
13. If a render is planned on the facade socket part, the mineral socket waterproofing is applied to approx. 20 cm below the upper ground level. The basement wall waterproofing (thick-layer coating) is carried out approx. 20 cm overlapping up to the upper ground level on the thoroughly dried socket waterproofing. On the socket area above ground level, spray the quick-setting stipple coat weber.san 951 S full-surface onto the fully dried mineral waterproofing.
-
14. Apply the waterproof render weber.tec 934 in a layer thickness of approx. 15 mm on the hardened stipple coat weber.san 951 S and rule level; after initial setting, smooth the render with a damp brush or a sponge float.


Find all our products near you in more than 2000 outlets